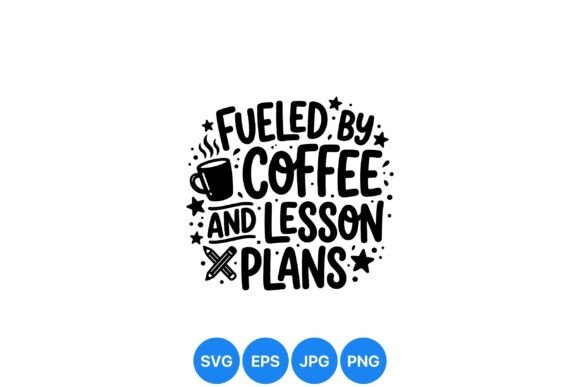
Fueled by Coffee Teaching Design: An Embroidery Review
I recently prepared a custom order for a teacher appreciation gift—a set of embroidered canvas totes. The Fueled by Coffee Teaching Design was the perfect fit. This hand-drawn lettering graphic, with its coffee cup and pencils, arrives as a clean vector illustration from the Graphics category. For embroidery, it’s a promising starting point. The black-and-white minimalist style means I can focus on stitch quality without wrestling with color gradients. But as always, I needed to test how it would hold up in real projects.
The first thing I noticed was the layout. The lettering “fueled by coffee and lesson plans” flows naturally, with the coffee cup and pencils tucked beside it. There’s generous negative space, which is a relief for digitizing. No cramped details that would turn into a dense, unforgiving stitch block. The hand-drawn quality gives it a sketchbook feel—imperfect in the best way. For a machine embroidery design conversion, this means I can use a clean satin stitch for the text and a lighter fill for the cup, keeping the fabric soft.
A Mood That Educators Instantly Recognize
This design doesn’t just say “coffee.” It nods to the specific chaos of teaching—the lesson plans, the early mornings, the pencils that never seem to stay sharp. It’s witty without being sarcastic. When I stitched it onto a gray sweatshirt, the charcoal thread gave it a quiet, knowing look. I knew the recipient would laugh because it’s true. For Etsy sellers or craft business owners, this relatability is a powerful sales tool. It turns a simple handmade product into a statement piece.
Real-World Stitching: What Worked and What Needed Tweaking
I tested the design on three blanks: a mid-weight tote, a crewneck sweatshirt, and a 4x4 zipper pouch. On the tote, with a 4-inch-wide placement, it was crisp. The black thread on natural canvas looked like a chalkboard drawing. The custom apparel option on the sweatshirt was equally strong, but I used a cut-away stabilizer to prevent puckering on the knit. The pouch, however, taught me a lesson. At 3 inches wide, the pencil lines became indistinct. For small hoop sizes, I’d recommend simplifying the digitizing: remove the steam lines and thicken the lettering slightly.
On dark fabric, the design shines. The high contrast makes it pop, and since it’s monochrome, you don’t have to worry about color matching. On textured fabric like a waffle weave towel, the stitches can sink in, so a heavier stabilizer is key. I’d avoid extremely thin fabric or stretchy fabric without a backing, because the satin lettering can distort. For curved surfaces like a structured cap, the horizontal layout is a challenge—stick to flat items like aprons, pillow covers, or tea towels.
Where This Design Belongs in Your Product Line
I see this graphic living on a dozen different products. A tote bag design for a teacher’s library runs. A holiday embroidery gift for a favorite colleague. An embroidered patch for a denim jacket. It’s also perfect for baby embroidery on a blanket for a teacher’s new baby—the message stays playful. For shop owners, consider using it in a printable mockup to test customer interest before stitching. The Illustrations file can be placed on a digital tote preview to gauge reactions.
Practical Notes for the Embroidery Designer
Here’s what I keep in mind when working with this file:
- Digitize with intention. The vector is clean, so conversion is straightforward. Assign a satin stitch to the lettering, a running stitch to the cup outline, and a light fill for the steam. Test on scrap fabric to ensure the stitch density doesn’t cause stiffness.
- Check thread color contrast. On light backgrounds, a dark thread works. On dark backgrounds, use a bright thread or a metallic for a fun twist. Always test on black and white mockups to see how the design reads.
- Confirm hoop size. I recommend a 5x7 or larger hoop for the full design. A 4x4 can work if you scale down wisely, but inspect the small details like pencil tips.
- Use proper stabilizer. For sweatshirt embroidery, a no-show mesh stabilizer is my go-to. For tote bags, a tear-away is fine.
- Check licensing. Since this is a Graphics download, review the terms for commercial use. Most illustrator files allow finished product sales, but confirm before you list personalized gifts or digital embroidery file bundles.
Is It Worth Adding to Your Collection?
After three stitch-outs and a few tweaks, the Fueled by Coffee Teaching Design has earned a spot in my go-to folder. It’s not just a design; it’s a conversation starter. The visual appeal is immediate, the stitching clarity is high, and the product value it adds is tangible. A teacher receiving a tote with this message will feel understood, and that’s the kind of customer trust that builds a loyal following. For any embroidery project that needs a touch of humor and heart, this graphic delivers. Just remember to test your settings, honor the original linework, and let the message shine.